How to Dye Your Hair Extensions
If you’re thinking about dyeing your hair extensions, we have one thing to say: it’s about freaking time we can do this, isn’t it??
Once upon a time, even making the suggestion that you were going to be dyeing your hair extensions would have been met with shock, then hesitant laughter, then disbelief, a little bit more laughter and then a sigh as the person you were speaking with gently broke it down to you why dyeing your hair extensions would be the absolute worst thing that you could do.
Why Dyeing Hair Extensions Used to Be a Bad Thing
In the early days of hair extensions and wigs, the hair that was used to make the extensions was of questionable origins. Many people bought synthetic hair masquerading as human hair, or they’d purchased “human” hair that came mixed with all types of unidentifiable fillers. When they tried to dye that “hair”, they ended up with a tangled, knotted and ruined mess. If people wanted different colored hair, they had to buy the hair in the color they were looking for.
Why Dyeing Hair Extensions is Now a GOOD Thing
Today, when you buy human hair extensions from a high-quality seller, you’re buying genuine human hair that you can treat the same way that you would treat your very own hair. That means you can cut it, condition it, curl it, straighten it and DYE IT. Great human is hair that has the cuticles aligned and intact. When human hair is sold in this condition, it looks, feels and functions like healthy human hair. The absolute best, “cream-of-the-crop” human hair is healthy hair that comes from a single donor, and that’s the hair that will give you amazing results
How to Dye Your Extensions: Steps
SO! You’ve got your rich, gorgeous bundles that you’re already envisioning in lovely shades of brown, red, blond, grey or whatever color makes you happy. We’d love to tell you have a professional dye your extensions, but if you insist on doing them yourself, check out the following tips.
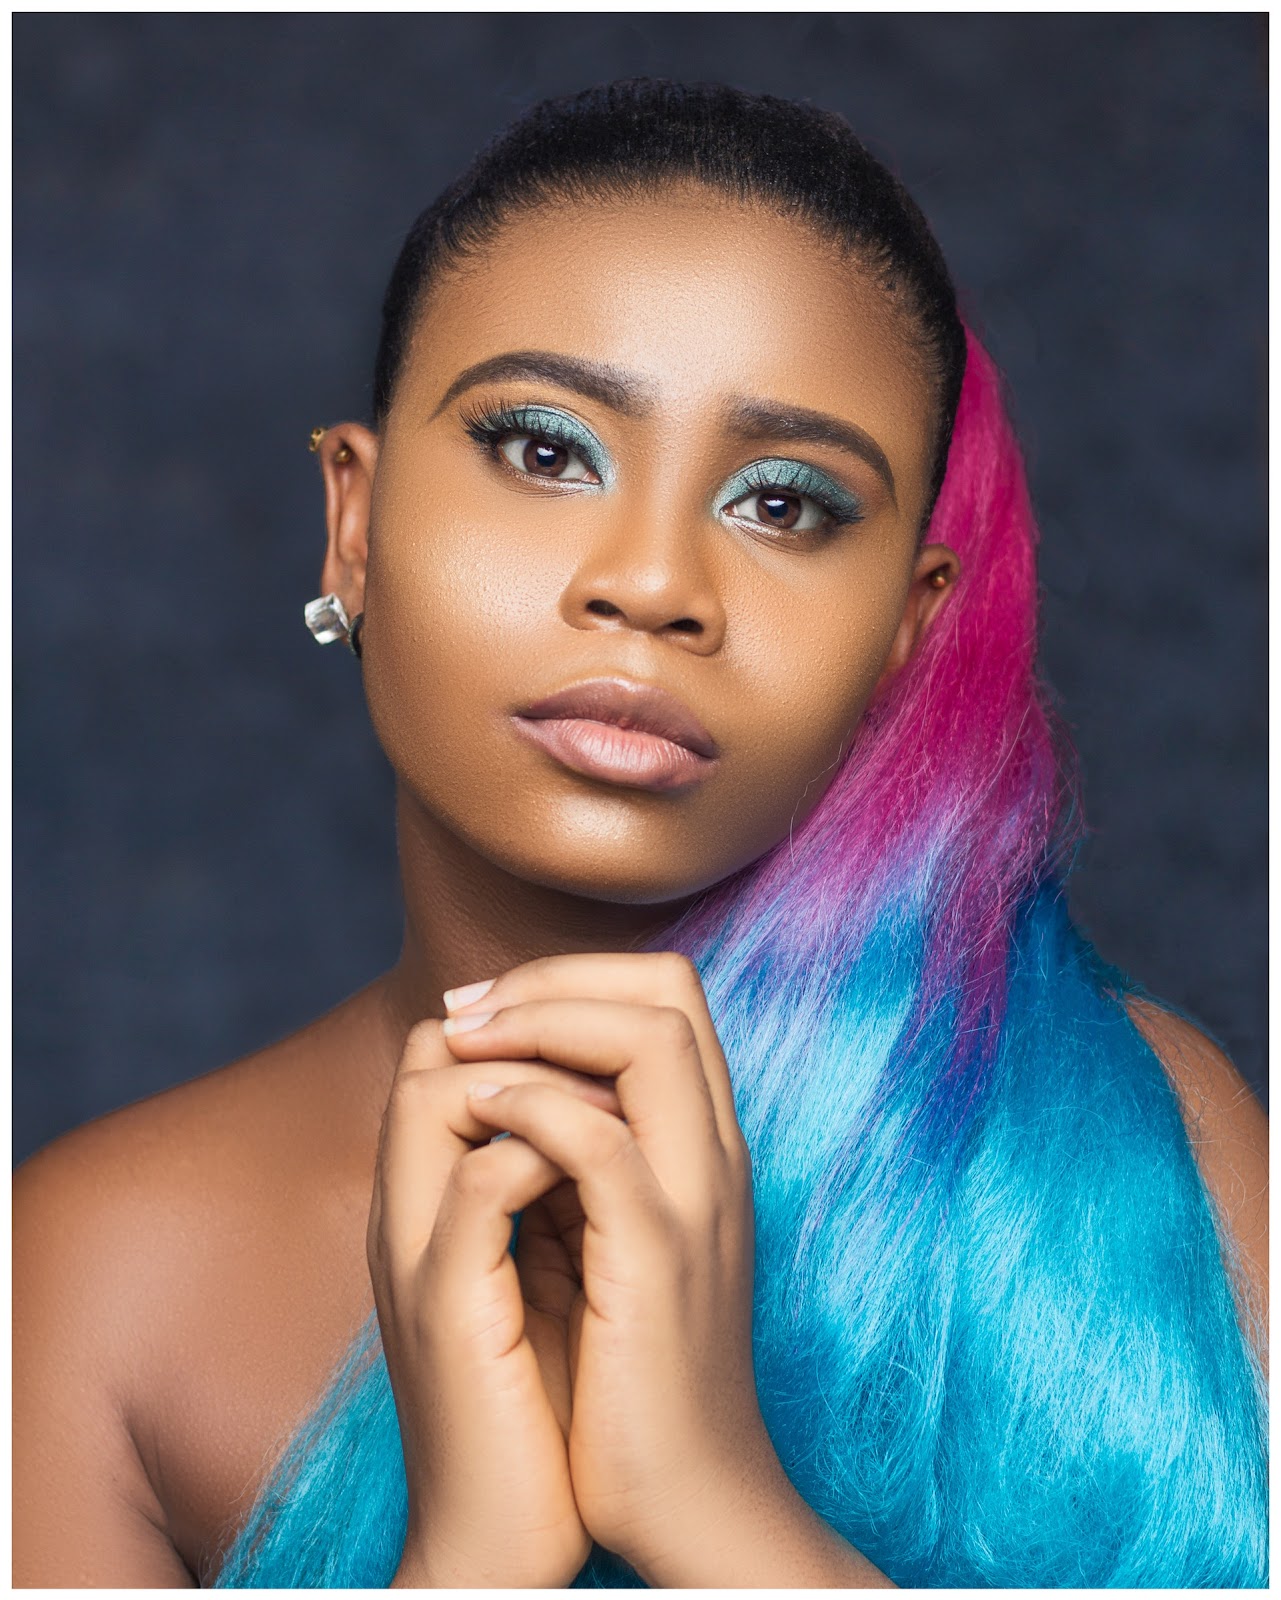
Ready to Dye
- Gather Everything You Need
When you’re ready to dye your extensions, gather everything you need before you begin. Although it would make for a (very!) funny sitcom episode to see you running around looking for the dye neutralizer before the hair that’s been sitting in dye for 30 minutes melts away into oblivion, but in real life? There’d be absolutely nothing funny about it. Gather every single supply you need ahead of time so that you’re not scrambling. In addition to the box of dye, you’ll need a mixing bowl, shampoo, a wide-tooth comb and some old towels you don’t care about (to wipe up the extra dye).
- Do a Strand Test
Whether you’re relaxing your hair, dyeing it, or staining a wood table, manufacturers always tell you to test a small section of the product first. Take the last few inches of a tiny section of the extension hair, and apply the dye as instructed. You’ll then be able to see what the final color will look like, AND you’ll be able to see if the texture of the hair was affected by the dye.
- Wash the Hair
Wash the hair, and allow it to dry thoroughly before you dye it. This will create a clean, dry surface that will absorb the dye better. Make sure that the shampoo you use is free of alcohol and sulfates. Fill a bowl with lukewarm water and squeeze a few spoonfuls of shampoo into the bowl. Gently wash the hair by dipping it into the water while gripping it at the weft, washing the strands gently with your fingers and taking care not to rub. Your goal is to remove any coating on the hair, not scrub it into shreds. Using a wide-tooth comb or your fingers, gently remove any tangles.
- Go From Light to Dark Instead of From Dark to Light if You’re a Noob
You may have bought natural black curly extensions before realizing that you really wanted platinum curly hair. Unless you’re a professional stylist, don’t do it yourself. It’s a much more involved process involving bleaching, developers, tin foil and a ton of other items that are probably too much to handle for someone who hasn’t done it before. In other words, you’d ruin it. Going from light to dark is a much easier process.
- Use semi or demi-permanent dye
Semi or demi-permanent dyes are perfect for extensions because they’re a lot less harsh on the hair. You’ll still get the color that you want, but your extension hair won’t face as much exposure to harsh ingredients as it would with permanent dye.
- Follow the Instructions on the box
Follow the instructions on the hair dye box. Make sure when you’re applying the dye that you coat both sides of the hair so that every single strand is saturated with the dye. Start from the weft brush the dye onto the hair in a downwards motion - you’re following the direction of the hair’s cuticles. If you haphazardly apply the dye in any direction, you’ll disturb the cuticles, leaving you with tangled, streaky hair.
- Maintain, Maintain, Maintain
One the hair is dyed, you’re finally ready to install it. Dyed hair needs tons more conditioning than hair that isn’t dyed, so you and your conditioner will become best friends. You’ll want to use products like reconstructive masks, deep conditioners and moisturizers used to restore and freshen weaves.
